


In today’s installment of gear tips, we’re going to be talking about 500 series and more specifically how to install and remove modules in your chassis. If you’re not careful you might actually cause some damage to your gear, so this is what we do and just kind of a best practice for getting set up. We’re demonstrating on an API 500-series chassis, and notably API is the creator of the 500 series format.
The first thing you want to do is make sure there is no power going to the rails. One way to ensure this is to unplug your chassis. None of these modules should be getting juice during installation, or this may cause some shortage and potentially damage your gear. So, double check that no lights are ON at the front of your 500 chassis.
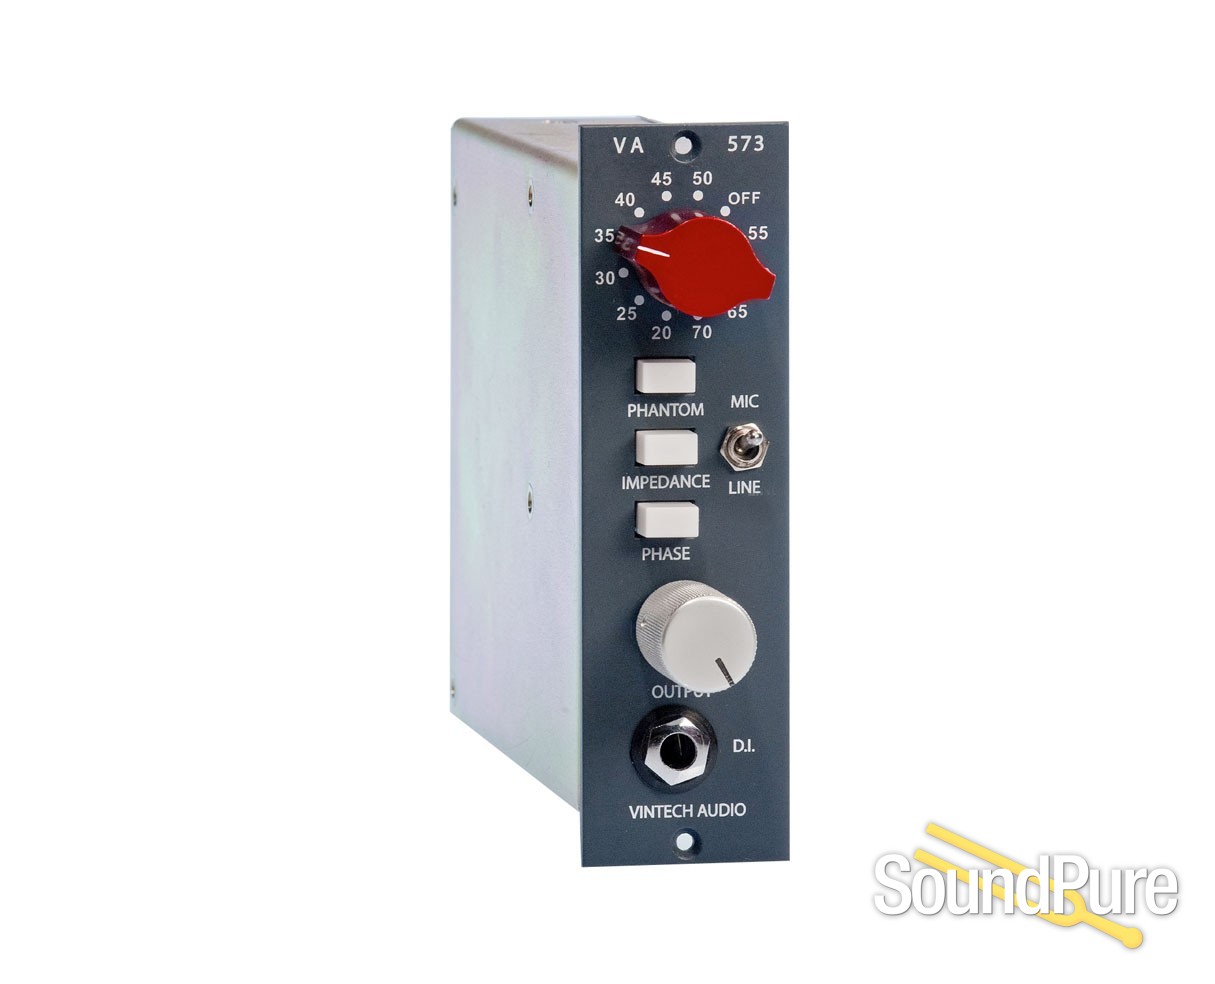
The 500-series module that we’re going to use to demonstrate this process, is the Vintech 573. This is a really well-built unit, and one of our favorite Neve 1073-style mic preamps. If you have any experience with older desktop computers, you may find that this process is very similar to installing a PCIe card into a Mac or PC tower. Basically, you are taking the card, and carefully sliding it into the slot, so it locks in place. Start by slowly inserting the unit into the opening on the chassis. Be careful where you grab the module and also not to scratch the surrounding modules with the back edges of the module you are installing, because it can be a tight squeeze when you’ve got a full rack. Also you don’t want to be yanking on the knobs and pushing and pulling things out of place. Once you have the module almost flush with the front edge of the chassis, (about 0.250” out) you should hold it there while trying to line the card up with the slot. It might be tricky to gauge if you’re on track to line up, so we suggest syncing up the screw holes on the module to the screw holes on the chassis and holding the module perfectly parallel to the chassis.
Once you feel like you got it aligned, you’re going to notice a little bit of resistance, apply a little pressure to see if you are lined up, but don’t jam it in. If you’re not perfectly aligned, or if it’s inserted at the wrong angle and you push too hard, it can potentially damage something. Once you have it lined up on top and bottom, give it a little tiny push and it will secure itself in place. Now that it’s locked in, go ahead and install the screws, tightening only until snug. Do not overtighten these screws, as they are small Phillips (#1) heads and can strip easily, especially when trying to loosen them.
Now that you are done installing, you can plug in your 500-chassis and turn the power switch to ON if it has one. Some chassis do and some don’t. If your module is installed properly, depending on what your 500 module is, you should see an LED power light, and if you switch Phantom Power On, you should see that LED turn on.
Let’s move on to removing the modules. Again, make sure there’s no power going to the rails. As previously stated, some racks have a simple Power switch to where you don’t have to actually unplug it.
After you’ve unscrewed your screws, hold the module where you can get a nice grip, but don’t grab or yank the module. Quite often this takes a little bit of force, but do not pry on the edges of the module with tools which will chip and damage the paint (coating). Just get a hold of a couple of knobs and just slowly pull until you feel the tension start to loosen up, then lighten up a bit on your force so it doesn’t pop out abruptly if the fit is a bit tight. Alternatively, if you have fingernails, you can use them to gently pry the unit out from the top and bottom edges at the same time. Once you get it partially unseated, continue to wiggle it until it unseats, or grab two knobs and pull and you’re gonna hear it come out, and then you are good to go.
API Audio 500V 10-Space Rack

In this installment of Sound Pure Gear Tips, pro audio specialist Marc Kuzio shows us how to properly insert and remove a 500-series module. Marc demonstrates how to install units with an API Audio 500V 10-space rack (API, incidentally, being the creators of the 500-series format). Make sure there is zero power going to the rails so that they won’t get damaged by a short, and follow best practices on this simple procedure to get the most out of your gear!
Additional Gear Used in This Demo